
How to Make a Study Table at Home?
A study table at home helps improve focus, organization, and productivity. It supports students, remote workers, and creative professionals in maintaining a structured learning environment. Building one at home can be simple, cost-effective, and customizable according to available space, materials, and personal design preferences for long-term daily use.
How to Make a Study Table at Home?
Making a study table at home requires planning, material selection, cutting, assembly, and finishing. First, decide the table size based on available space. A standard study table is usually 120 cm long, 60 cm wide, and 75 cm high. Measure your room before starting construction to ensure proper fit.
Next, select materials such as plywood, solid wood, or MDF board. Wood is durable and long-lasting, while MDF is more affordable and easy to work with. You also need screws, wood glue, sandpaper, a drill machine, measuring tape, and a saw.
Cut the tabletop and four legs according to your measurements. Attach the legs firmly to the tabletop using screws and metal brackets for stability. Ensure all joints are tight and aligned properly. Sand all surfaces to remove rough edges and create a smooth finish.
Finally, apply wood polish or paint for protection and aesthetics. Add a storage drawer or shelf if needed. Your study table is now ready for use in a comfortable study setup.
Planning the Design and Dimensions
A study table design should match room size and usage requirements. Proper planning reduces waste and improves functionality. The design stage is important before purchasing materials.
Choosing the Right Size
The study table size depends on user height and room space. A height of 75 cm suits most adults and students. A width of 50 to 70 cm provides enough workspace for books and a laptop.
Selecting a Suitable Style
A simple rectangular design is easiest for beginners. Corner tables are useful for small rooms. Wall-mounted foldable tables save maximum space in compact apartments.
Materials Needed for a Study Table
Choosing the right materials ensures durability and long-term use. The strength of the study table depends on wood quality, hardware, and finishing products.
Wooden Board Selection
Plywood is widely used for home study tables due to strength and affordability. Solid wood offers higher durability but costs more. MDF boards provide a smooth surface for painting.
Tools and Hardware Requirements
Basic tools include a saw, drill machine, screwdriver, and measuring tape. Hardware items include screws, nails, L-brackets, wood glue, and hinges if drawers are included.
Step-by-Step Construction Process
A structured construction process ensures safety and accuracy. Each step should be completed carefully to avoid misalignment or weak joints.
Cutting and Preparing Parts
Measure and cut the tabletop, legs, and support panels. Ensure all cuts are straight and precise. Label each part for easy assembly during construction.
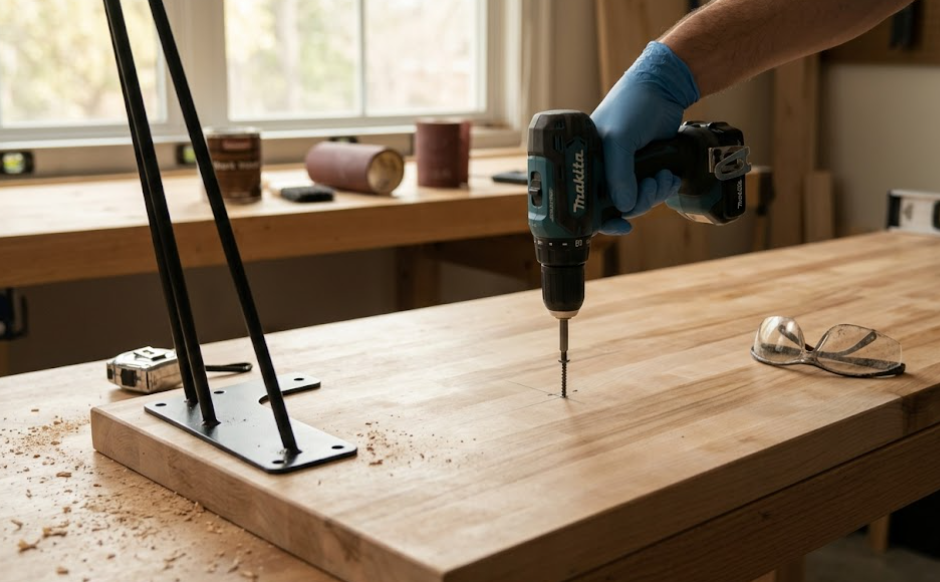
Assembling the Frame
Attach the legs to the tabletop using screws and metal brackets. Add horizontal supports between legs for extra stability. Tighten all joints securely to prevent movement.
Adding Storage Features
Install drawers or shelves under the tabletop if required. Use sliding rails for smooth drawer movement. Storage improves organization and reduces clutter on the table surface.
Finishing and Surface Treatment
Finishing improves appearance and increases durability of the study table. Proper treatment protects wood from moisture, scratches, and daily wear.
Sanding the Surface
Sand the entire table using medium and fine sandpaper. This step removes rough edges and prepares the surface for paint or polish.
Painting or Polishing
Apply wood paint for a modern look or polish for a natural wooden finish. Multiple coats improve durability and shine. Allow proper drying time between coats.
Setting Up a Productive Study Space
A study table is more effective when placed in a well-organized environment. Proper lighting and seating improve concentration and comfort.
Lighting Arrangement
Place the study table near a window for natural light. Add a desk lamp for night study sessions. Proper lighting reduces eye strain and improves focus.
Chair Selection and Comfort
Use an ergonomic chair that supports the back. Adjustable height chairs improve posture. Comfort directly affects study efficiency and long working hours.
Maintenance Tips for Study Table
Regular maintenance increases the lifespan of the study table. Simple care routines keep the table clean and stable over time.
Cleaning Routine
Clean the surface daily using a dry or slightly damp cloth. Avoid harsh chemicals that may damage wood polish or paint.
Preventing Damage
Avoid placing heavy objects on weak corners. Use coasters for water bottles. Tighten screws every few months to maintain stability.
Common Mistakes to Avoid
Many people make errors during study table construction. Avoiding these mistakes improves safety and durability of the final structure.
Incorrect Measurements
Wrong measurements lead to uneven tables. Always double-check dimensions before cutting wood pieces.
Weak Joint Assembly
Loose joints reduce table strength. Use proper screws and brackets instead of only glue for better stability.
Poor Material Choice
Low-quality wood reduces lifespan. Always choose strong and moisture-resistant materials for long-term use.
Benefits of a Homemade Study Table
A homemade study table provides customization, cost savings, and satisfaction. It allows users to design according to personal needs and space availability.
Cost Efficiency
Building a study table at home is more affordable than buying a ready-made product. It reduces labor and retail costs significantly.
Custom Design Flexibility
Users can add drawers, shelves, or cable holders. Custom design improves usability based on study or work requirements.
Space Optimization
A home-built table fits perfectly into small or irregular spaces. It improves room organization and usability.
Frequently Asked Questions
What is the ideal height for a study table?
A standard study table height is around 75 cm, suitable for most adults and students.
Which wood is best for a homemade study table?
Plywood is commonly preferred due to its strength, affordability, and easy handling.
Can a study table be made without power tools?
Yes, basic hand tools can be used, but power tools improve accuracy and speed.
How long does it take to build a study table?
It usually takes 4 to 8 hours depending on design complexity and experience level.
Is painting necessary for a study table?
Painting or polishing is recommended to protect wood and improve durability.
Conclusion
A study table made at home provides a practical solution for learning and work needs. It improves organization and supports better posture during long study hours. Proper material selection and careful assembly ensure long-lasting performance. A well-designed table enhances daily productivity and creates a focused learning environment in any room.